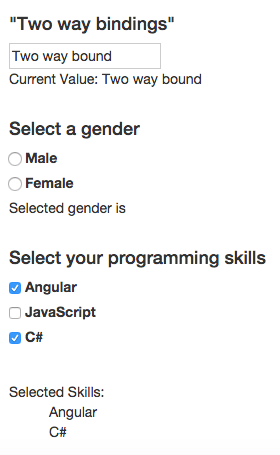
Capturing user input is an important part of web development, so in the following post I will demonstrate how to use common input controls like textbox, checkbox and radio button in Angular.
Textbox
2-way binding in Angular 1.x made capturing text input very convenient through two way bound ng-models. As you may have heard, Angular has dropped 2-way bindings, so to create the same effect we have to rely on a combination of event and property bindings. This may seem inconvenient, but luckily, the Angular team has given us syntactic sugar that hides the added complexity. In the following example I will show a “two-way bound” textbox using the new syntax.
The key to the two way binding effect is the [(ng-model)] syntax where a property binding and an event binding is combined into a single binding expression.
Radio button
Radio buttons can be wired up using a simple click binding like so:
Notice how I am using the #male and #female aliases to represent the underlying DOM elements.
Checkbox
The next example will show how to create a checkbox list where the user may make multiple selections to showcase their programming skills. The selected choices are bound to a list.
Again I am using aliases for the underlying DOM elements, but notice how I am toggling the backing data property using the (change) binding.
The rest of the component is defined in the following TypeScript snippet
As always my samples are available as a live demo as well as on Github.
Below is a screenshot of what the UI looks like.